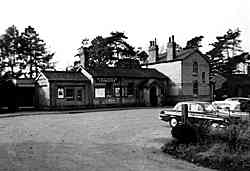
Cranleigh
Station Buildings - c.1960
Cranleigh Railway Dot Info - Archive Photograph
Photo used with permission © Gerry Bixley |
 |
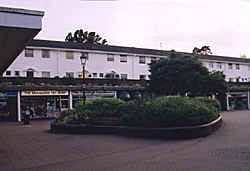
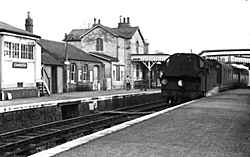
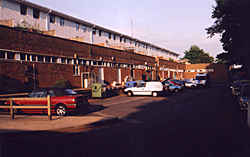
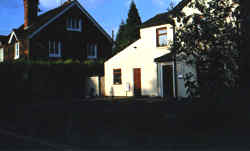
Cranleigh
Stocklund Square - 2001
Cranleigh Railway Dot Info |
The front of the station
building was slightly set back from the the High Street.
It is now a row of shops, with Maisonettes above, and is
called 'Stocklund Square'.
In 2004 half of the row of shops and the existing 'Somerfield'
supermarket were demolished and turned into a new Sainsbury's
supermarket. (picture to follow soon) |
| |
|
|
| |
|
|
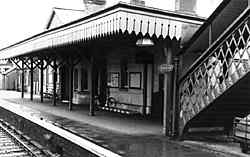
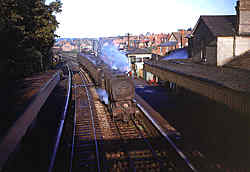
Cranleigh
Station Platforms - 1965
Capital Transport Publishing |
|

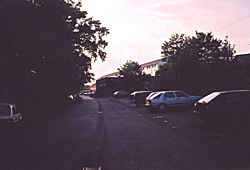
Cranleigh
Station Platforms - 2001
Cranleigh Railway Dot Info |
| Behind Stocklund Square
is it's loading bay, this is where the lines ran. The level
crossing's gate house can be seen at the end of the platform,
brick in 1965, but today painted white. These shots are
taken facing east towards Horsham. |
| |
|
|
| |
|
|
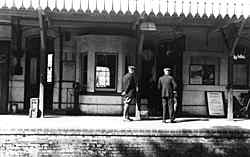
Cranleigh
Station Platforms - c.1965
Capital Railway Dot Info - Archive Photograph
Photo used with permission © Norman Hamshere |
|
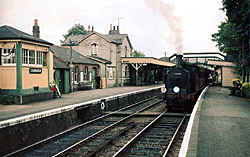
Cranleigh
Station Platforms - 1960
Capital Transport Publishing |
| |
|
|
Cranleigh
Station Platforms - 2001
Cranleigh Railway Dot Info |
|
Looking east towards Horsham
again, this time from Platform 2 on two different occasions.
Today the back of Stocklund
Square's shops can be seen with the white maisonettes
above.
|
| |
| |
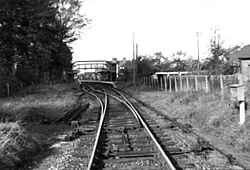
Cranleigh
Station Passing Loop - c.1960
Cranleigh Railway Dot Info - Archive Photograph
Photo used with permission © Norman Hamshere |
|
Cranleigh
Station Passing Loop - 2001
Cranleigh Railway Dot Info - 2001 |
| |
|
|
| Looking west towards
Guildford from Cranleigh's level crossing, that allowed
trains to cross over Knowle Lane. |
| |
|
|
| |
|
|
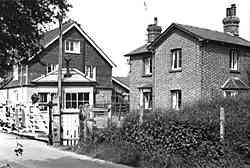
Cranleigh
Crossing Gate House - c.1960
Cranleigh Railway Dot Info - Archive Photograph
Photo used with permission © Norman Hamshere |
|
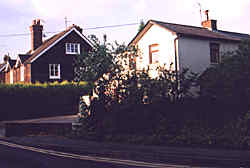
Cranleigh
Crossing Gate House - 2001
Cranleigh Railway Dot Info - 2001 |
| |
|
|
| Standing in Knowle
Lane looking North-East across the level crossing to the
Gate House. Today the building has been painted white, but
is still called 'The Gate House'. |
| |
|
|
| |
|
|
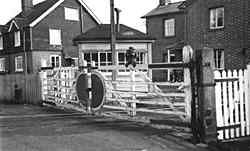
Cranleigh
Level Crossing - c.1960
Cranleigh Railway Dot Info - Archive Photograph
Photo used with permission © Norman Hamshere |
|
Cranleigh
Level Crossing - 2001
Cranleigh Railway Dot Info - 2001 |
| |
|
|
| A similar view to
above, taken slightly further up Knowle Lane. |
| |
|
|
|
| |
|
|
| A few photos that
have not yet been 're-taken' today: |
| |
|
|
Cranleigh
Station Platform 1 - c.1960
Cranleigh Railway Dot Info - Archive Photograph
Photo used with permission © Norman Hamshere |
|
Cranleigh
Station Platform 1 - c.1960
Cranleigh Railway Dot Info - Archive Photograph
Photo used with permission © Norman Hamshere |
| Platform 1. From
this angle, it's presumably taken from a trian. |
|
Platform 1's ticket
office & waiting room. Taken from Platform 2. |
| |
|
|
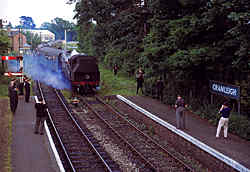
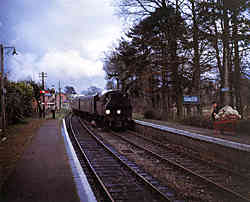
Cranleigh
Station Last Day - 1965
Capital Transport Publishing |
|
Cranleigh
Station 'Sunday Special' - 1965
Capital Transport Publishing |
| Last day of normal service on
the line, a train from Horsham pulling into Cranleigh. Taken
from the passenger foot bridge. |
|
A 'Sunday Special' train from
Guildford, pulling into Cranleigh the weekend after the
line officially closed to normal service. |
| |
|
|
|